|
|
# Outline Wiki
|
|
|
|
|
|
This is the hardest deployment I’ve ever done. I wouldn’t have been able to deploy this without [Guru Computing’s Blog](https://blog.gurucomputing.com.au/Knowledgebases%20with%20Outline/Installing%20Outline%20Knowledgebase/)! I do not advise deploying this unless you’ve had some experience with deploying any of the other apps in this repostitory. If you get stuck here please refer to Guru’s Computing’s blog!
|
|
|
|
|
|
## Minimum File Structure
|
|
|
|
|
|
```
|
|
|
/home/
|
|
|
└── ~/
|
|
|
└── docker/
|
|
|
└── outline/
|
|
|
├── .env
|
|
|
├── docker-compose.yml
|
|
|
├── docker.env
|
|
|
|
|
|
└── keycloak/
|
|
|
├── .env
|
|
|
├── docker-compose.yml
|
|
|
```
|
|
|
|
|
|
## Add to Caddyfile (from \~/docker/caddy)
|
|
|
|
|
|
Remember to `docker exec -w /etc/caddy caddy caddy reload` after editing your Caddyfile.
|
|
|
|
|
|
```
|
|
|
outline.yourdomain.com {
|
|
|
reverse_proxy outline:3000
|
|
|
}
|
|
|
outlinedata.yourdomain.com {
|
|
|
reverse_proxy outline-minio:9000
|
|
|
}
|
|
|
outlinedata-admin.yourdomain.com {
|
|
|
reverse_proxy outline-minio:9001
|
|
|
}
|
|
|
auth.yourdomain.com {
|
|
|
reverse_proxy keycloak:8080
|
|
|
}
|
|
|
```
|
|
|
|
|
|
outline-minio is the s3 bucket we’ll be using.
|
|
|
|
|
|
keycloak is the auth provider we will be self hosting
|
|
|
|
|
|
# The “keycloak” directory
|
|
|
|
|
|
We will start with keycloak for single sign on first because it is easier and we need to get the client secret from it for outline! Start by creating a empty keycloak directory similar to the minimum file structure section above.
|
|
|
|
|
|
## docker-compose.yml
|
|
|
|
|
|
Copy and use the same docker-compose.yml in this repo’s ./keycloak directory
|
|
|
|
|
|
Feel free to change the version of the pull in this repo I'm using 0.72.0
|
|
|
|
|
|
Then you copy the .env in this repo to the same directory and modify it
|
|
|
|
|
|
## modifying the .env
|
|
|
|
|
|
This is self explanatory. There are 3 lines to modify after the = sign
|
|
|
|
|
|
```javascript
|
|
|
KC_DB_PASSWORD=<insert long and scary password>
|
|
|
KC_HOSTNAME=auth.yourdomain.com
|
|
|
KEYCLOAK_ADMIN_PASSWORD=<insert another long and scary password>
|
|
|
```
|
|
|
|
|
|
After you have both the docker-compose.yml and .env ready it’s time to start up the instances
|
|
|
|
|
|
```javascript
|
|
|
docker-compose up -d
|
|
|
```
|
|
|
|
|
|
### Keycloak Configuration
|
|
|
|
|
|
On your browser go to `https://auth.yourdomain.com/`and login to the Administration Console
|
|
|
|
|
|
* In your keycloak portal, under **clients**, create a new **oidc** client for **outline.yourdomain.com**. Set the following values:
|
|
|
|
|
|
```javascript
|
|
|
Client Auth: On
|
|
|
Client ID (can be whatever): outline.<your-domain>.com
|
|
|
Name (can be whatever): outline.<your-domain>.com
|
|
|
Root URL: https://outline.<your-domain>.com
|
|
|
Home URL: https://outline.<your-domain>.com
|
|
|
redirect URI: https://outline.<your-domain>.com/auth/oidc.callback
|
|
|
```
|
|
|
|
|
|
|
|
|
|
|
|
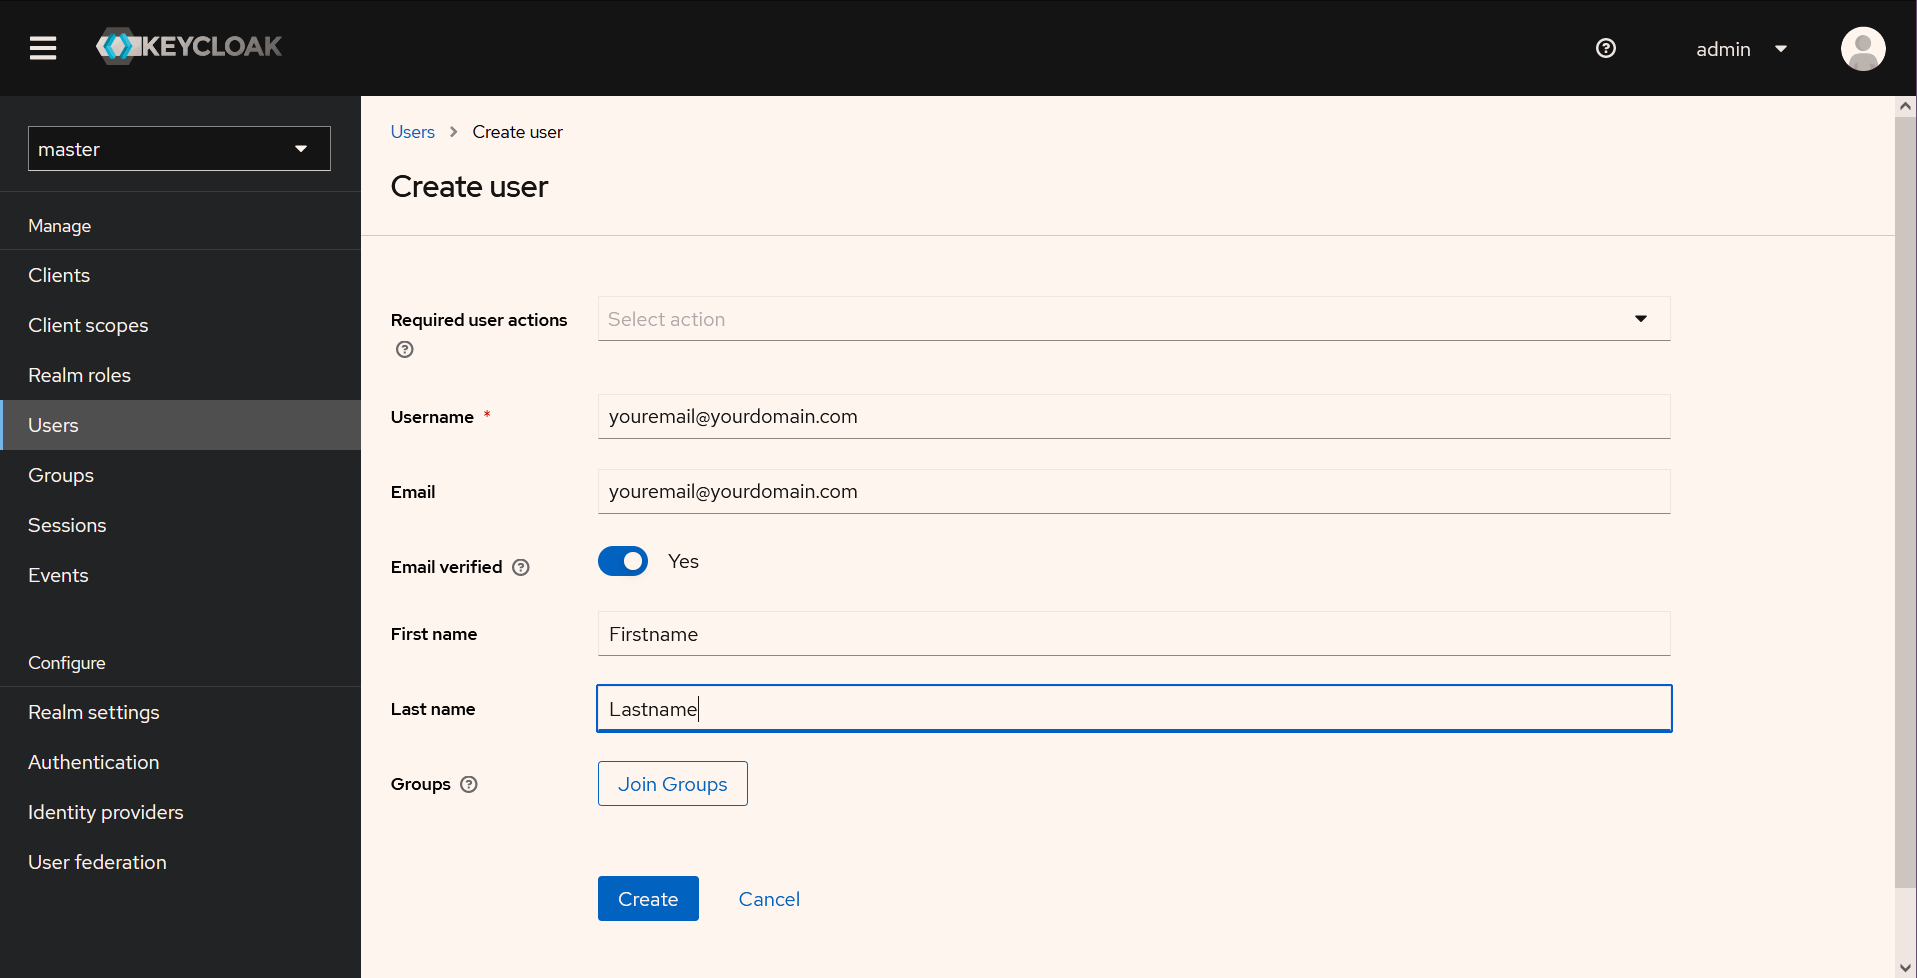
Finally create an account under users and set a password.
|
|
|
|
|
|
|
|
|
|
|
|
|
|
|
# The “outline” directory
|
|
|
|
|
|
This one is much harder!
|
|
|
|
|
|
## docker-compose.yml
|
|
|
|
|
|
Use the same docker-compose.yml located inside the outline directory of this repository
|
|
|
|
|
|
## docker.env
|
|
|
|
|
|
From the same directory in this repo copy and make modifications to `docker.env` to suit your environment
|
|
|
|
|
|
5 variables that contain `yourdomain.com`needs to have `yourdomain.com`substituted with your own domain
|
|
|
|
|
|
1 variables that say `<insert long and scary minio password>` need to be replaced with your own password
|
|
|
|
|
|
2 variables that say `<insert long and scary PG password>` need to be replaced with your own password
|
|
|
|
|
|
1 variable `SECRET_KEY=<Generate with openssl rand -hex 32>` needs to have it’s SECRET_KEY replaced by the output of `openssl rand -hex 32`
|
|
|
|
|
|
1 variable `UTILS_SECRET=<Generate with openssl rand -hex 32>` needs to have it’s UTIL_SECRET replaced by the output of `openssl rand -hex 32`
|
|
|
|
|
|
### Modify the OIDC Authentication section of docker.env
|
|
|
|
|
|
The 5 lines below need modification where `yourdomain.com` is replaced with your actual domain!
|
|
|
|
|
|
```javascript
|
|
|
OIDC_CLIENT_ID=outline.yourdomain.com
|
|
|
OIDC_CLIENT_SECRET=<use your own client secret generated in keycloak>
|
|
|
OIDC_AUTH_URI=https://auth.yourdomain.com/realms/master/protocol/openid-connect/auth
|
|
|
OIDC_TOKEN_URI=https://auth.yourdomain.com/realms/master/protocol/openid-connect/token
|
|
|
OIDC_USERINFO_URI=https://auth.yourdomain.com/realms/master/protocol/openid-connect/userinfo
|
|
|
```
|
|
|
|
|
|
### Optional: Set up SMTP variables to receive emails from outline
|
|
|
|
|
|
```javascript
|
|
|
SMTP_HOST=
|
|
|
SMTP_PORT=
|
|
|
SMTP_USERNAME=
|
|
|
SMTP_PASSWORD=
|
|
|
SMTP_FROM_EMAIL=hello@example.com
|
|
|
SMTP_REPLY_EMAIL=hello@example.com
|
|
|
SMTP_TLS_CIPHERS=
|
|
|
SMTP_SECURE=true
|
|
|
```
|
|
|
|
|
|
## .env modifications needed
|
|
|
|
|
|
The three variables `MINIO_ROOT_PASSWORD`, `MINIO_BROWSER_REDIRECT_URL`, and `POSTGRES_PW` need to be replaced similarly to docker.env. Use the same minio password `<insert long and scary minio password>` and PG `<insert long and scary PG password>` password as above. As for the URL replace `yourdomain.com` with your actual domain you will be hosting this on.
|
|
|
|
|
|
```javascript
|
|
|
MINIO_ROOT_PASSWORD=<insert long and scary minio password>
|
|
|
MINIO_BROWSER_REDIRECT_URL=https://outlinedata.yourdomain.com
|
|
|
POSTGRES_PW=<insert long and scary PG password>
|
|
|
```
|
|
|
|
|
|
## Now that all files and modifications are in place. In the outline directory…
|
|
|
|
|
|
Create the db by running
|
|
|
|
|
|
```javascript
|
|
|
docker-compose run --rm outline yarn db:create --env=production-ssl-disabled
|
|
|
```
|
|
|
|
|
|
You’ll get some error saying
|
|
|
|
|
|
```javascript
|
|
|
ERROR: getaddrinfo EAI_AGAIN outline-postgres
|
|
|
```
|
|
|
|
|
|
Don’t worry we will carry on. Now run
|
|
|
|
|
|
```javascript
|
|
|
sudo chown -R 999:999 ./psqldatabase-data
|
|
|
```
|
|
|
|
|
|
Then run the migration command below
|
|
|
|
|
|
```javascript
|
|
|
docker-compose run --rm outline yarn db:migrate --env=production-ssl-disabled
|
|
|
```
|
|
|
|
|
|
After migration is complete. You can start the app with
|
|
|
|
|
|
```javascript
|
|
|
docker-compose up -d
|
|
|
```
|
|
|
|
|
|
Optional: If you run into any problems inspect the logs with
|
|
|
|
|
|
```javascript
|
|
|
docker-compose logs -f
|
|
|
```
|
|
|
|
|
|
Optional: Anytime you want to start over from scratch you can run the following in the ./outline directory
|
|
|
|
|
|
```javascript
|
|
|
docker-compose down --remove-orphans -v
|
|
|
sudo rm -R container-data/ psqldatabase-data/ redis.conf/
|
|
|
```
|
|
|
|
|
|
Okay so outline is finished hosting!
|
|
|
|
|
|
## Logging into your minio bucket and creating outlinebucket
|
|
|
|
|
|
This step needs to be done so you can drag / drop upload files to your outline pages
|
|
|
|
|
|
In your browser go to `https://outlinedata-admin.yourdomain.com` and login
|
|
|
|
|
|
Finally create a bucket called `outlinebucket`
|
|
|
|
|
|
After creation, under the anonymous tab add two access rules: `avatar` and `public` as readonly access rules. Don’t worry if you’re confused here’s a gif below explaining all this.
|
|
|
|
|
|
|
|
|
|
|
|
That’s it!
|
|
|
|
|
|
Now login to outline with your keycloak account. And you should be able to drag and drop images to your documents!
|
|
|
|
|
|
|
|
|
## Troubleshooting
|
|
|
|
|
|
You may have to run
|
|
|
|
|
|
`sudo chown -R systemd-coredump:systemd-coredump psqldatabase-data/`
|
|
|
|
|
|
on your psqldatabase-data folder if you get the error (on docker-compose logs -f) that says
|
|
|
|
|
|
`initdb: error: could not change permissions of directory "/var/lib/postgresql/data": Operation not permitted`
|
|
|
|
|
|
## Migrating Domain Notes
|
|
|
back up .env, docker-compose.yml, and docker.env
|
|
|
|
|
|
edit only docker.env (if you plan on keeping same database + keycloak)
|
|
|
```
|
|
|
URL=https://outline.stoplagging.com
|
|
|
PORT=3000
|
|
|
|
|
|
OIDC_CLIENT_ID=outline.stoplagging.com
|
|
|
```
|
|
|
|
|
|
If new instance with new database edit
|
|
|
```
|
|
|
AWS_S3_UPLOAD_BUCKET_URL=https://outlinedata.stoplagging.com
|
|
|
```
|
|
|
|
|
|
If new instance with new keycloak edit
|
|
|
|
|
|
```
|
|
|
OIDC_AUTH_URI=https://auth.stoplagging.com/realms/master/protocol/openid-connect/auth
|
|
|
OIDC_TOKEN_URI=https://auth.stoplagging.com/realms/master/protocol/openid-connect/token
|
|
|
OIDC_USERINFO_URI=https://auth.stoplagging.com/realms/master/protocol/openid-connect/userinfo
|
|
|
```
|
|
|
|
|
|
docker-compose up again
|
|
|
don't forget to edit caddy
|
|
|
docker exec -w /etc/caddy caddy caddy reload
|
|
|
|
|
|
Now in keycloak go to Clients
|
|
|
export the original domain name
|
|
|
edit the .json
|
|
|
find & replace all old domain name with new domain name in text editor.
|
|
|
Edit description
|
|
|
reimport new domain name! |